- Hp Recovery Drive Almost Full Windows 7
- Hp Recovery Partition Windows 7 How To Use
- Hp Recovery Drive Full Windows 7 Pc
I'd get a larger drive, and use Acronis or Paragon partition managers to dupe the drive onto the larger partition.
Tell me about it.. I started with 250GB Hard drives in my XP system, when I Upgraded to Win 7 I had to get 320 GB drives, then 500 GB drives, and finally 1 TB drives. Right now I have 2 500 giggers, they are totally packed.. Last month I bought another 1TB drive, it is totally full now. I just don't know where the space goes, I absulutely require everything I have saved, cos I build and repair computers, I have to keep an exhaustive library of Drivers, OS's. I even run a program that allows me to read my Mac partitions as if they are attached right to my PC.
If you are not sure about what you need.. And if your backup is bursting at the seams, then do this:
1) Check your system - Make sure it is in absolute perfect order, no little glitches. If that is the case then:
2) Delete your entire Backup drive. Sounds drastic, but if you are in no danger, you should be OK.
3) Once you clear ouot all that space, just make one Brand New Backup, and then tell your Backup program to make a Backup ONLY When you tell it to.
Cos it counds like you have some kind of Automatic Backup going, I'd dhut it off, do it manually, cos if you keep going, your backup partition will soon get totyally filled.
Ideally, you want to keep all of your drives about 1/4 full for best computer performance. Now myself, I keep them 80% full, causes me a lot of problems cos I'm a packrat, cant affor 6 2 TB drives to move all my storage onto, so I gotta keep all my archives on sevreral partitions.
If your system is working well and you have at least half of your system drive free - Then delete your backup drive.
But only if there is nothing on that drive that is not on your System drives.. If you are saving a lot of Documents and ISO images and pictures, you may want to keep only those on a separate drive, other than your System backup drive.
PC manufacturers often include recovery partitions. These are usually hidden, but sometimes become visible under This PC and elsewhere in Windows. Here’s how to hide a recovery partition—or any other drive.
We’ll be removing a partition’s drive letter to hide it. The partition will still be visible to disk management tools, but it won’t appear in Explorer and normal desktop applications. You can always reassign a drive letter to it in the future.
Option One: Use Disk Management
For many partitions, you can do this with the graphical Disk Management tool. To open it on Windows 10, right-click the Start button (or press Windows+X), and then click the “Disk Management” option.
To open it on Windows 7, open your Start menu, type “hard disk” into the search box, and then click the “Create and format hard disk partitions” shortcut.
Locate the partition you want to hide. For example, if you want to hide the drive that has the letter “D:” under File Explorer, look for the partition that has the letter “D:” under the Volume column in the Disk Management window.
Right-click that partition, and then select the “Change Drive Letter and Paths” command.
If you don’t see any options other than “Help “when you right-click a drive, continue to the next section instead. You’ll need to use the
diskpart command to remove the drive letter. The graphical interface won’t let you.Select the drive letter you want to remove in the window that appears, click the “Remove” button, and then click the “OK” button.
Each partition generally has only a single drive letter. If the partition has multiple drive letters assigned to it, you’ll probably want to remove each from here.
Windows warns you that programs may not run correctly if you remove the drive letter. For example, if you installed an application on this drive or stored important files on it, you won’t be able to access them while the drive doesn’t have a letter assigned to it.
Click “Yes” to continue.
If the drive is currently in use, you’re warned that you must restart your PC to finish the process. Click “Yes” again, and then restart your PC. The drive won’t be visible in Windows after you finish this process.
If you want to make the drive visible again in the future, head back to the Disk Management tool, go to the Change Drive Letter and Paths window, and then click the “Add” button to add a drive letter to it.

Give the drive the same letter as it had before and everything should work properly, even if you installed applications on the drive before you removed its drive letter.
Option Two: Run the Diskpart Command
The Disk Management tool can’t work with every partition. To hide stubborn partitions, you’ll need to run the
diskpart command.First, identify the drive letter of the partition you want to hide. You can find this under This PC in File Explorer on Windows 10, or under Computer in Windows Explorer on Windows 7.
For example, in the screenshot below, we want to hide the “G:” drive.
This command must be run from a Command Prompt window launched with Administrator permissions. To launch one, open your Start menu, type “cmd” into the search box, right-click “Command Prompt” result, and the select the “Run as Administrator” command.
At the prompt, launch the tool by typing the following command and hitting Enter:
Note that the prompt changes to “DISKPART>” to indicate that you’re now inside that tool. Type the following command and then hit Enter to list the volumes attached to your computer:
Oct 28, 2012 - Now usually when installing mods, they just contain the mod folder (e.g. You would normally install this directly in modules and that. Jun 29, 2011 - This is an expansion to Floris Expanded Mod Pack, you need it to play this mod. 1) Make a copy of your.WarbandModulesFloris Expanded Mod Pack folder. 1) Unzip into your.WarbandModulesFloris Expanded Mod Pack folder. 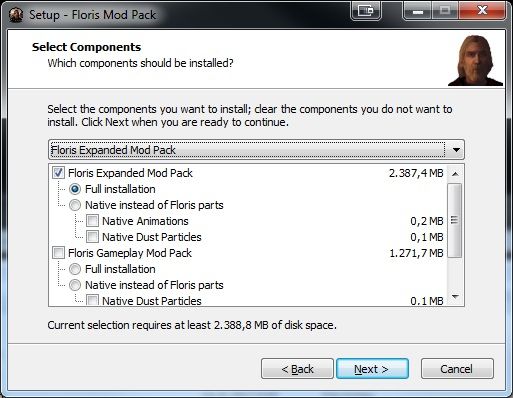 Nov 21, 2014 - Hey guys, I just downloaded the floris mod pack and I thought there was. I also can't find a guide to how to manually install this mod, anyone. Universal Installation Issues. If you're having a problem with getting the mod to run properly and it doesn't match something from the Known Bugs list then it is. I know i need to install Floris manually, because i did it before on Windows. But the directory systems should be different on Linux, and also i.
Identify the volume number of the partition you want to hide. For example, we want to hide the partition with the drive letter G:, which we can see is “Volume 1” in the above screenshot.
Run the following command to select the partition, replacing # with the number of the volume:
In our example, we want to select volume 1, so we’d run the following command:
Run the following command to remove the drive letter, replacing G with the letter you want to remove:
The recovery partition or any other drive will instantly be hidden.
Of course, you can’t use either of these tricks to hide the Windows system drive, which is normally located at C:. Windows needs this partition available to function.
READ NEXT- › How to Stream UFC 239 Jon Jones vs. Santos Online
- › How to Check Your Wi-Fi Signal Strength
- › What Is “Upscaling” on a TV, and How Does It Work?
- › How to See the Applications Using Your Network on Windows 10
- › How to See All Devices on Your Network With nmap on Linux
A Recovery Drive lets you boot your system and easily access a number of recovery and troubleshooting tools to revive a failing Windows 10 system. If you haven't done so yet, you need to create a Windows 10 Recovery Drive. That way, you'll be prepared should you encounter a problem with your Windows 10 installation.
In Windows 10, you can create a Recovery Drive on a USB flash drive as well as on an optical disc. While both procedures produce the same recovery tool, they are created from different user interfaces. The USB flash drive version is created using a stand-alone tool; the optical disc is created from the Backup And Restore (Windows 7) user interface. Why Microsoft didn't unify the process under one roof, I don't know. In this article, I'll show you both ways to create a Windows 10 Recovery Drive.
Caveat
Regardless of whether you are creating a Recovery Drive on a USB flash drive or on an optical disc, it is important to remember that a Recovery Drive is bit specific. In other words, if you create a Recovery Drive in a 64-bit version of Windows 10, you can't use that drive to boot up and repair a 32-bit version of Windows 10. Likewise, you can't use a 32-bit Recovery Drive in a 64-bit Windows 10 system.
Using a USB flash drive
The USB flash drive you use will become a dedicated Recovery Drive—you won't be able to use it for anything else. In its base configuration, the contents of the Recovery Drive will require about 330 MB of space. However, if you choose to include the system files, which will allow you to use the Recovery Drive to reinstall Windows, you'll need more space. Thus, if you are creating a basic Recovery Drive, you can use a 1GB USB flash drive. (If you have a smaller drive, from the old days, you could use it as well.) If you are going to add system files, you'll want at least a 16GB USB flash drive.
To launch the USB flash drive version of the Recovery Drive creation tool, open the Control Panel and type Recovery in the search box. When the search is complete (a matter of seconds), click Create A Recovery Drive, as shown in Figure A. You'll then encounter a UAC, as shown in Figure B, and will need to click Yes to continue. As you can see in the UAC dialog box, the program name is listed as Recovery Media Creator.
Figure A
Accessing the Recovery Drive tool from the Control Panel is easy.
Figure B
When you launch the Recovery Drive tool, you'll encounter a UAC.
In a moment, you'll see the first screen in the Recovery Drive wizard, shown in Figure C. As you can see, backing up system files is optional. (If you select this option, you'll need a sufficiently large capacity USB flash drive.)
Figure C
If you choose to back up system files, you can use the Recovery Drive to reinstall Windows.
Hp Recovery Drive Almost Full Windows 7
For this example, I'm going to back up system files. To continue, click Next.
In the next screen of the Recovery Drive wizard, you'll be prompted to select your USB drive. If the drive isn't already connected to your system, insert it now. Windows 10 will then rescan the system and display your drive. Since I am backing up the system files, the wizard informs me that the drive will need to hold at least 16 GB and that everything currently on the drive will be deleted (Figure D). Remember, this will become a dedicated Recovery Drive. After you select your USB flash drive, click Next.
Figure D
The USB flash drive you choose to use will become a dedicated Recovery Drive.
In the next screen, shown in Figure E, you are once again warned that the contents of the drive will be deleted.
Figure E
Windows warns you again that everything on the drive will be deleted.
To continue, click the Create button. When you do, the Recovery Drive tool will format the drive and begin copying files to the drive, as shown in Figure F. If you are creating a basic Recovery Disk, the process will just take a few minutes. If you are including a system files, go get yourself a cup of coffee—it could take as long as an hour.
Figure F
If you are including system files, the creation process can take up to an hour.
When the process is complete, you'll be prompted to delete the recovery partition on your hard disk if you chose to include system files. You can open the drive in File Explorer so that you can see the contents, as shown in Figure G. You can then close the Recovery Drive wizard by clicking the Finish button.
Figure G
When the process is complete, you can check out the contents of the drive.
Using an optical disc
If you want to use an optical disc as a Recovery Drive, you'll use the old System Repair Disc tool from Windows 7. Keep in mind that while you will use this legacy interface, you will indeed end up with the same set of Windows 10 Recovery Drive tools as are on a USB flash drive created with the Recovery Drive wizard.
To launch the optical disc version of the Recovery Drive creation tool, open the Control Panel and type Windows 7 in the search box. When the search is complete (a matter of seconds), click the Backup And Restore (Windows 7) link, shown in Figure H.
Figure H
Accessing the Backup And Recovery (Windows 7) tool from the Control Panel is easy.
Now, when you see the Backup And Restore (Windows 7) user interface, select the Create A System Repair Disc command on the left side of the screen to launch the creation tool. This process is shown in Figure I.
Figure I
You'll launch the Create A System Repair Disc procedure from the Backup And Restore (Windows 7) user interface.
To start the procedure, click the Create Disc button. The program will begin the process of creating the disc, as shown in Figure J.
Figure J
Creating a Recovery Drive on an optical disc is a relatively quick procedure.
What's your take?
Will you use a USB flash drive or an optical disc to create a Recovery Drive? Share your opinion in the discussion thread below.
Also read..
Microsoft Weekly Newsletter
Be your company's Microsoft insider with the help of these Windows and Office tutorials and our experts' analyses of Microsoft's enterprise products. Delivered Mondays and Wednesdays
Hp Recovery Partition Windows 7 How To Use
Sign up today Sign up todayThere are several methods to perform an HP System Recovery in Windows 7. A system recovery is the process of reverting the computer back to factory condition. This is desirable if the computer has a lot of viruses, is crashing frequently or if it has begun to run sluggishly. Performing a system recovery in Windows 7 will remove all of your personal data, so before you begin, you should backup your documents, pictures, favorites and anything else you do not want to lose. Once you’re ready, use one of the methods below to restore your HP computer.
Start HP System Recovery From Within Windows
If your computer is booting normally, the quickest and easiest way to do a system recovery for your HP is right within Windows 7. To begin the process, click the Start button, then select All Programs>Recovery Manager and then click Recovery Manager from the menu. Be sure to disconnect any external devices, such as printers, cameras and extra hard drives as these could interfere with the recovery process.
In the I Need Help Immediately section, choose System Recovery. When asked if you want to revert your HP back to factory condition, select Yes and then click Next.
The computer will restart. If you still have the system recovery partition on the hard drive, it should reboot to a screen similar to the one you were at before restarting your computer. Click the System Recovery option from the I Need Help Immediately section and then choose if you want to backup any data before beginning. If you already have backups, you can just click Next. If you see any warning messages, just click through them.

The system recovery process begins at this point. It will reinstall the factory image from the recovery partition on your hard drive. Once the factory restore is complete, click finish to restart the computer.
Start The HP System Recovery From The Boot Screen
Are old aluminum pans safe. You can also initiate HP System Recovery in Windows 7 by tapping the F11 key when first booting the machine. You will see the Recovery Manager. Follow the steps from above to restore your computer.
Perform HP System Recovery Using Recovery Disks
You should take the time to create a set of recovery disks. You can do this from the Recovery Manager. If you choose to make the disks, you should use DVDs if possible, as this will require less disks. If you have the disks made and want to use them to perform the system recovery on your HP computer, simply insert the first disk into the drive and reboot the computer. Again, make sure all external devices are unplugged with the exception of the keyboard, mouse and video monitor. The Recovery Manager will launch automatically.

Select Factory Restore from your options, then click Yes on the screen that follows, then click Next. Click through the backup options and any warnings that appear. You will be asked to insert the various DVDs or CDs you have during the recovery process. When you see the message “Restoration Complete,” click Finish and restart your computer.
Reinstall Updates After System Recovery
The final step in restoring your HP computer in Windows 7 is to reinstall your old data and any security patches and updates from Microsoft. Visit Microsoft Update to download whatever patches you might be missing. You can then reinstall the driver software for your printer and any other USB devices you have. Once the driver software is installed, plug in those USB devices and they will be ready for use.
You should also consider looking up the model of your HP computer and reading the manual for specifics, as these instructions may vary from model to model.
Hp Recovery Drive Full Windows 7 Pc
Posted by3 years ago
Archived
Because I have no clue when it comes to computers, I bought an HP All in One which is equipped w/ w/1TB HD/SSD hybrid and for whatever reason, I thought it would be FASTER to have Geek Squad swap out the HD w/a 480GB SSD. I just felt (probably incorrectly) that with no moving parts, I would improve performance and extend the life of my system. I also bought more RAM, which I intend to pop in later.
Anyway, so I get it home and turn it on I'm CONSTANTLY getting the referenced message about LOW DISC SPACE ON RECOVERY DRIVE D. I found tons of resolutions for Vista and Windows 7, but nothing for Windows 10 - can anyone advise what I need to do.
Please be gentle, I am annoyingly computer illiterate!!!
6 comments
